How to Install a VPN on a School Computer? 6 Most Easy Steps.
In an era where online privacy and security are paramount, Virtual Private Networks (VPNs) have gained immense popularity. These digital guardians provide a shield of anonymity, safeguarding your browsing experience from prying eyes.
For students navigating the digital landscape of their school computers, VPNs can be a game-changer. They offer the ability to circumvent network restrictions, granting access to otherwise restricted content.
However, a word of caution: installing a VPN on a school computer should be approached with full awareness of the potential consequences and adherence to school policies.
Things You must know About How to Install a VPN on a School Computer:
Before diving into the technicalities of installing a VPN on your school computer, it’s crucial to ponder the implications. Understand your school’s policies and the gravity of violating them. Proceed if you are willing to accept the responsibilities that come with it.
Additionally, choose your VPN provider wisely. Opt for a reputable VPN service like ExpressVPN to ensure top-notch security and performance. Now, let’s delve into the step-by-step process of installing a VPN on your school computer.
Step 1: Choose a Reliable VPN Service

The foundation of your VPN journey lies in selecting the right service provider. Ideally, it would help if you opted for a VPN that is well-established, reliable, and reputable. In this realm, names like ExpressVPN, CyberGhost, and NordVPN stand out prominently.
These providers differ in terms of pricing and features, so it’s essential to conduct thorough research to determine which one aligns best with your needs. ExpressVPN, in particular, is a standout choice for school computers due to its impressive features.
ExpressVPN boasts a vast network of over 3,000 servers spanning across 94 countries. This expansive server network ensures that you can pick the best server for your privacy needs. Moreover, it guarantees maximum browsing speeds and minimal latency, which are invaluable for students seeking seamless online experiences.
Furthermore, ExpressVPN’s servers excel at bypassing network restrictions, making it an ideal choice for school environments. They are optimized for torrenting and streaming, ensuring that you can access your desired content without hindrance.
Step 2: Create an Account
Before you can proceed with downloading and installing the VPN client, you must create an account on the VPN provider’s official website. Typically, this entails providing your email address and setting up a password. Once your account is established, you’re ready for the next steps.
Step 3: Download the VPN Client
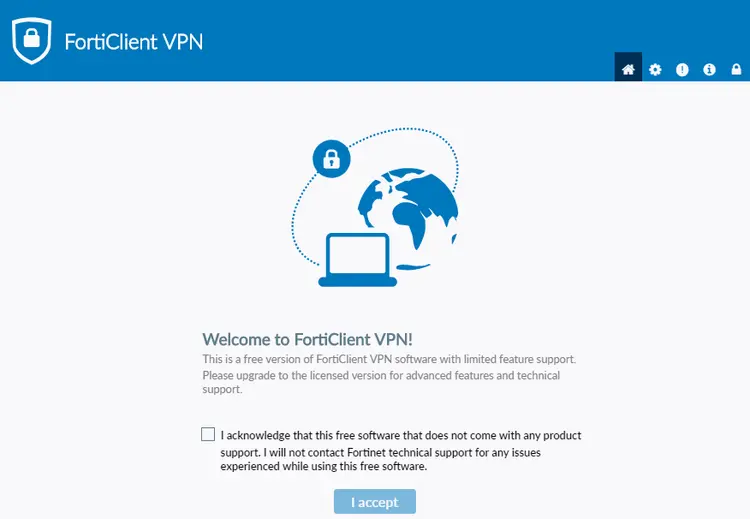
Now, it’s time to download the VPN client onto your school computer. Most VPN providers, including ExpressVPN, offer clients compatible with various operating systems such as Windows, Linux, and macOS.
Visit the official website of your chosen VPN provider and navigate to the “Download” section. Choose the client version that corresponds to your school computer’s operating system. It’s worth noting that you might require administrator rights to install the VPN. If this is the case, proceed to the next step.
Step 4: Install the VPN Client
Once the VPN client is downloaded, locate the installation file (typically a .exe or .dmg file) and initiate the installation process with a double click. Follow the on-screen instructions until the installation is complete. At this stage, you might be prompted to input the administrator password. If you lack this password, consider reaching out to your school’s IT department or explore portable VPN options that don’t necessitate installation.
Step 5: Configure the VPN Client
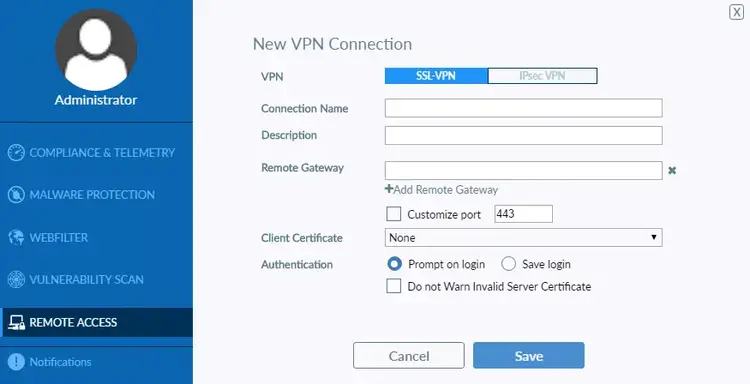
After successfully installing the VPN app, launch it by double-clicking and logging in using your credentials (email address and password). This step is crucial, so ensure you’ve completed the account creation process on the VPN provider’s website.
Once inside the VPN app, you’ll need to select a server location and configure other settings as required by the specific VPN client. For optimal performance, choose a server geographically close to your actual location to maximize internet speed and responsiveness.
Step 6: Connect to the VPN
With the server selected and settings configured, you’re now ready to connect to the VPN. Click the “Connect” button within the VPN app. This action will reroute your school computer’s internet traffic through the VPN server, safeguarding your online identity and ensuring a private and secure browsing experience.
To confirm that the VPN connection is active, visit websites like https://ipleak.net and check your device’s IP address. If it matches the one displayed in your VPN app, you’re all set. If not, troubleshoot the connection by disconnecting and reconnecting to the server.
Also Read Which Of The Following Statements Is True Regarding A VPN
Step 7: Disconnect and Uninstall (Optional)
When your VPN is no longer needed, it’s wise to disconnect from it to prevent unnecessary data usage and potential security risks. The VPN is typically associated with your email address, so disconnecting is a prudent measure.
To disconnect, click the “Disconnect” button within the VPN app. If you wish to erase all traces of your VPN activities, consider uninstalling the VPN client. Depending on your school computer’s operating system, this process may vary. On macOS, you can usually drag the VPN app to the trash bin, while on Windows, you may need to use the “Add or Remove Programs” feature.
Bottom Line:
In a digital age where online privacy is paramount, VPNs provide a crucial layer of protection, especially on school computers. However, the installation process should be undertaken with caution and in full compliance with school policies. Choosing a reliable VPN service like ExpressVPN and following the step-by-step guide outlined in this article can help students secure their online experiences and access restricted content responsibly.
10 Useful and Unique FAQs with Answers
Is it legal to use a VPN on a school computer?
Using a VPN on a school computer may or may not be legal, depending on your school’s policies. It’s essential to consult your school’s IT department or review the school’s technology usage guidelines to understand the legality.
Can I install a VPN on any school computer?
Installing a VPN on a school computer may require administrator rights. Be sure to check with your school’s IT department for guidance on whether this is allowed and how to proceed.
Why is ExpressVPN recommended for school computers?
ExpressVPN is recommended for its extensive server network, high-speed performance, and robust security features, making it an ideal choice for students seeking both privacy and unrestricted access.
Can a VPN help me bypass school network restrictions?
Yes, a VPN can bypass school network restrictions by rerouting your internet traffic through its servers, allowing access to blocked websites and content.
Are there risks involved in using a VPN on a school computer?
There can be risks, such as violating school policies and potential consequences. Additionally, using a VPN for illegal activities is prohibited and may result in legal repercussions.
Can I use a free VPN on my school computer?
While free VPNs exist, they often come with limitations in terms of security and performance. It’s advisable to choose a reputable paid VPN service for better protection.
How do I know if my VPN is working on my school computer?
There can be risks, such as violating school policies and potential consequences. Additionally, using a VPN for illegal activities is prohibited and may result in legal repercussions.
What should I do if I forget my VPN login credentials?
If you forget your login credentials, contact your VPN provider’s customer support for assistance in recovering your account.
Can a VPN help me access social media on a school computer?
Yes, a VPN can help you access social media platforms that are otherwise restricted on your school’s network.
Are there any drawbacks to using a VPN on a school computer?
Some drawbacks may include slower internet speeds due to encryption and the risk of violating school policies. It’s essential to use a VPN responsibly and in compliance with your school’s guidelines.

